Introduction to AR.js and Natural Feature Tracking
- Introduction to AR.js and Natural Feature Tracking
AR.js
AR.js is a lightweight library for Augmented Reality on the Web, coming with features like Image Tracking, Location based AR and Marker tracking. It is the easiest option for cross-browser augmented reality.
The same code works for iOS, Android, Desktops and even VR Browsers!
It was initially created by Jerome Etienne and is now maintained by Nicolo Carpignoli and the AR-js Organisation
NFT
Usually for augmented reality you need specialised markers, like this Hiro marker (notice the thick non-aesthetic borders 🤢)

This is called marker based tracking where the code knows what to look for. NFT or Natural Feature Tracing converts normal images into markers by extracting 'features' from it, this way you can use any image of your liking!
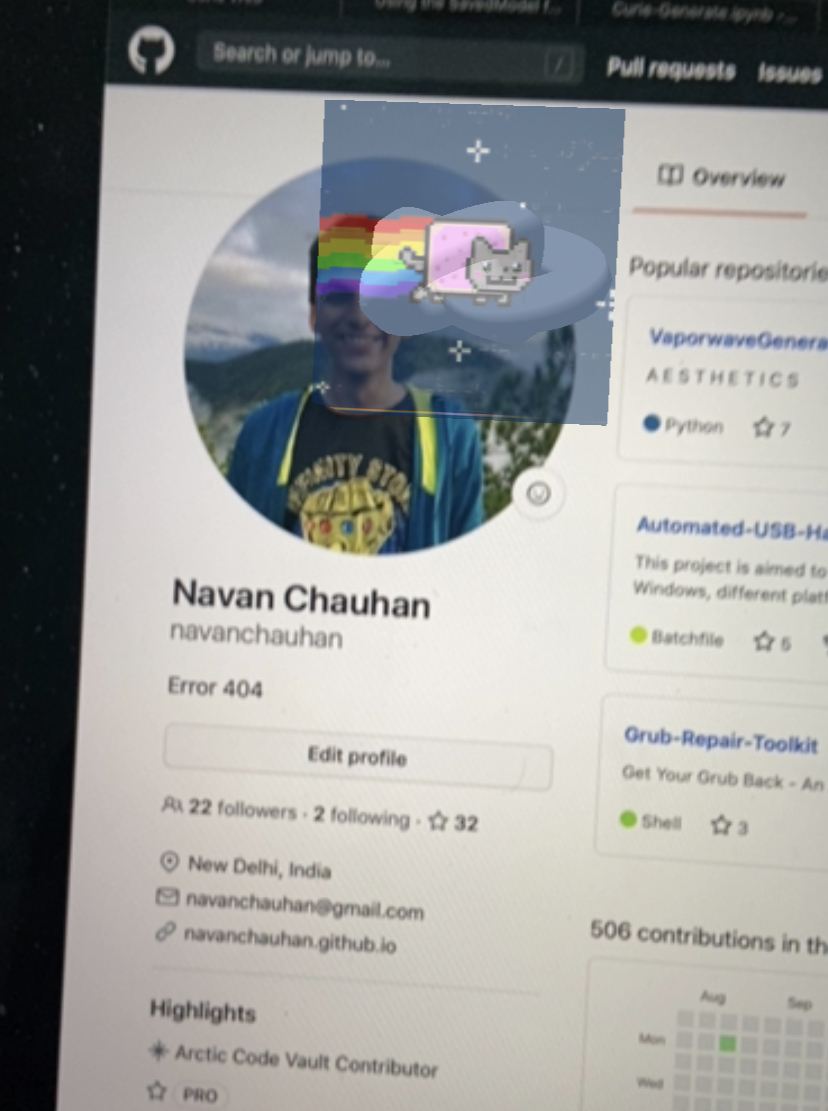
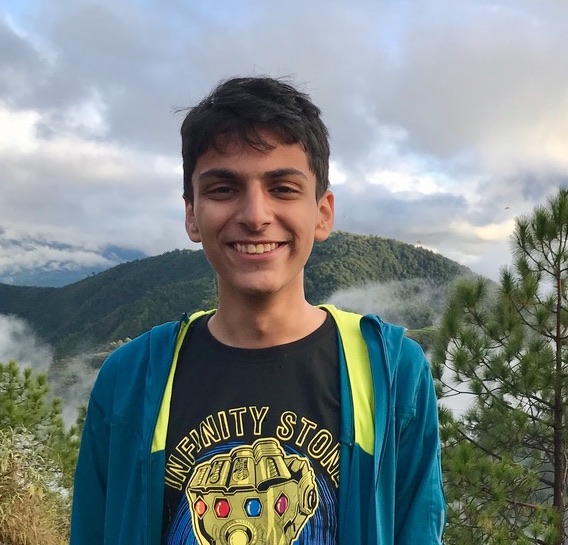
I'll be using my GitHub profile picture
Creating the Marker!
First we need to create the marker files required by AR.js for NFT. For this we use Carnaux's repository 'NFT-Marker-Creator'.
$ git clone https://github.com/Carnaux/NFT-Marker-Creator

Cloning into 'NFT-Marker-Creator'...
remote: Enumerating objects: 79, done.
remote: Counting objects: 100% (79/79), done.
remote: Compressing objects: 100% (72/72), done.
remote: Total 580 (delta 10), reused 59 (delta 7), pack-reused 501
Receiving objects: 100% (580/580), 9.88 MiB | 282.00 KiB/s, done.
Resolving deltas: 100% (262/262), done.

$ cd NFT-Makrer-Creator
Install the dependencies
$ npm install

npm WARN [email protected] No repository field.

added 67 packages from 56 contributors and audited 67 packages in 2.96s

1 package is looking for funding
  run <!--CODE_BLOCK_2710--> for details

found 0 vulnerabilities


   ╭────────────────────────────────────────────────────────────────╮
   │                                                                │
   │      New patch version of npm available! 6.14.5 → 6.14.7       │
   │   Changelog: https://github.com/npm/cli/releases/tag/v6.14.7   │
   │               Run npm install -g npm to update!                │
   │                                                                │
   ╰────────────────────────────────────────────────────────────────╯
Copy the target marker to the folder
$ cp ~/CodingAndStuff/ARjs/me.png .
Generate Marker
$ node app.js -i me.png

Confidence level: [ * * * * * ] 5/5 || Entropy: 5.24 || Current max: 5.17 min: 4.6

Do you want to continue? (Y/N)
y
writeStringToMemory is deprecated and should not be called! Use stringToUTF8() instead!
[info]
Commands:
[info] --
Generator started at 2020-08-01 16:01:41 +0580
[info] Tracking Extraction Level = 2
[info] MAX_THRESH  = 0.900000
[info] MIN_THRESH  = 0.550000
[info] SD_THRESH   = 8.000000
[info] Initialization Extraction Level = 1
[info] SURF_FEATURE = 100
[info]  min allow 3.699000.
[info] Image DPI (1): 3.699000
[info] Image DPI (2): 4.660448
[info] Image DPI (3): 5.871797
[info] Image DPI (4): 7.398000
[info] Image DPI (5): 9.320896
[info] Image DPI (6): 11.743593
[info] Image DPI (7): 14.796000
[info] Image DPI (8): 18.641792
[info] Image DPI (9): 23.487186
[info] Image DPI (10): 29.592001
[info] Image DPI (11): 37.283585
[info] Image DPI (12): 46.974373
[info] Image DPI (13): 59.184002
[info] Image DPI (14): 72.000000
[info] Generating ImageSet...
[info]    (Source image xsize=568, ysize=545, channels=3, dpi=72.0).
[info]   Done.
[info] Saving to asa.iset...
[info]   Done.
[info] Generating FeatureList...

...

[info] (46, 44) 5.871797[dpi]
[info] Freak features - 23[info] ========= 23 ===========
[info] (37, 35) 4.660448[dpi]
[info] Freak features - 19[info] ========= 19 ===========
[info] (29, 28) 3.699000[dpi]
[info] Freak features - 9[info] ========= 9 ===========
[info]   Done.
[info] Saving FeatureSet3...
[info]   Done.
[info] Generator finished at 2020-08-01 16:02:02 +0580
--

Finished marker creation!
Now configuring demo!

Finished!
To run demo use: 'npm run demo'
Now we have the required files in the output folder
$ ls output

me.fset  me.fset3 me.iset
Creating the HTML Page
Create a new file called index.html in your project folder. This is the basic template we are going to use. Replace me with the root filename of your image, for example NeverGonnaGiveYouUp.png will become NeverGonnaGiveYouUp. Make sure you have copied all three files from the output folder in the previous step to the root of your project folder.
<script src="https://cdn.jsdelivr.net/gh/aframevr/aframe@1c2407b26c61958baa93967b5412487cd94b290b/dist/aframe-master.min.js"></script>
<script src="https://raw.githack.com/AR-js-org/AR.js/master/aframe/build/aframe-ar-nft.js"></script>

<style>
  .arjs-loader {
    height: 100%;
    width: 100%;
    position: absolute;
    top: 0;
    left: 0;
    background-color: rgba(0, 0, 0, 0.8);
    z-index: 9999;
    display: flex;
    justify-content: center;
    align-items: center;
  }

  .arjs-loader div {
    text-align: center;
    font-size: 1.25em;
    color: white;
  }
</style>

<body style="margin : 0px; overflow: hidden;">
  <div class="arjs-loader">
    <div>Calculating Image Descriptors....</div>
  </div>
  <a-scene
    vr-mode-ui="enabled: false;"
    renderer="logarithmicDepthBuffer: true;"
    embedded
    arjs="trackingMethod: best; sourceType: webcam;debugUIEnabled: false;"
  >
    <a-nft
      type="nft"
      url="./me"
      smooth="true"
      smoothCount="10"
      smoothTolerance=".01"
      smoothThreshold="5"
    >

    </a-nft>
    <a-entity camera></a-entity>
  </a-scene>
</body>
In this we are creating a AFrame scene and we are telling it that we want to use NFT Tracking. The amazing part about using AFrame is that we are able to use all AFrame objects!
Adding a simple box
Let us add a simple box!
<a-nft .....>
    <a-box position='100 0.5 -180' material='opacity: 0.5; side: double' scale="100 100 100"></a-box>
</a-nft>
Now to test it out we will need to create a simple server, I use Python's inbuilt SimpleHTTPServer alongside ngrok
In one terminal window, cd to the project directory. Currently your project folder should have 4 files, index.html, me.fset3, me.fset and me.iset
Open up two terminal windows and cd into your project folder then run the following commands to start up your server.
In the first terminal window start the Python Server
$ cd ~/CodingAndStuff/ARjs
$ python2 -m SimpleHTTPServer

Serving HTTP on 0.0.0.0 port 8000 ...
In the other window run ngrok ( Make sure you have installed it prior to running this step )
$ ngrok http 8000
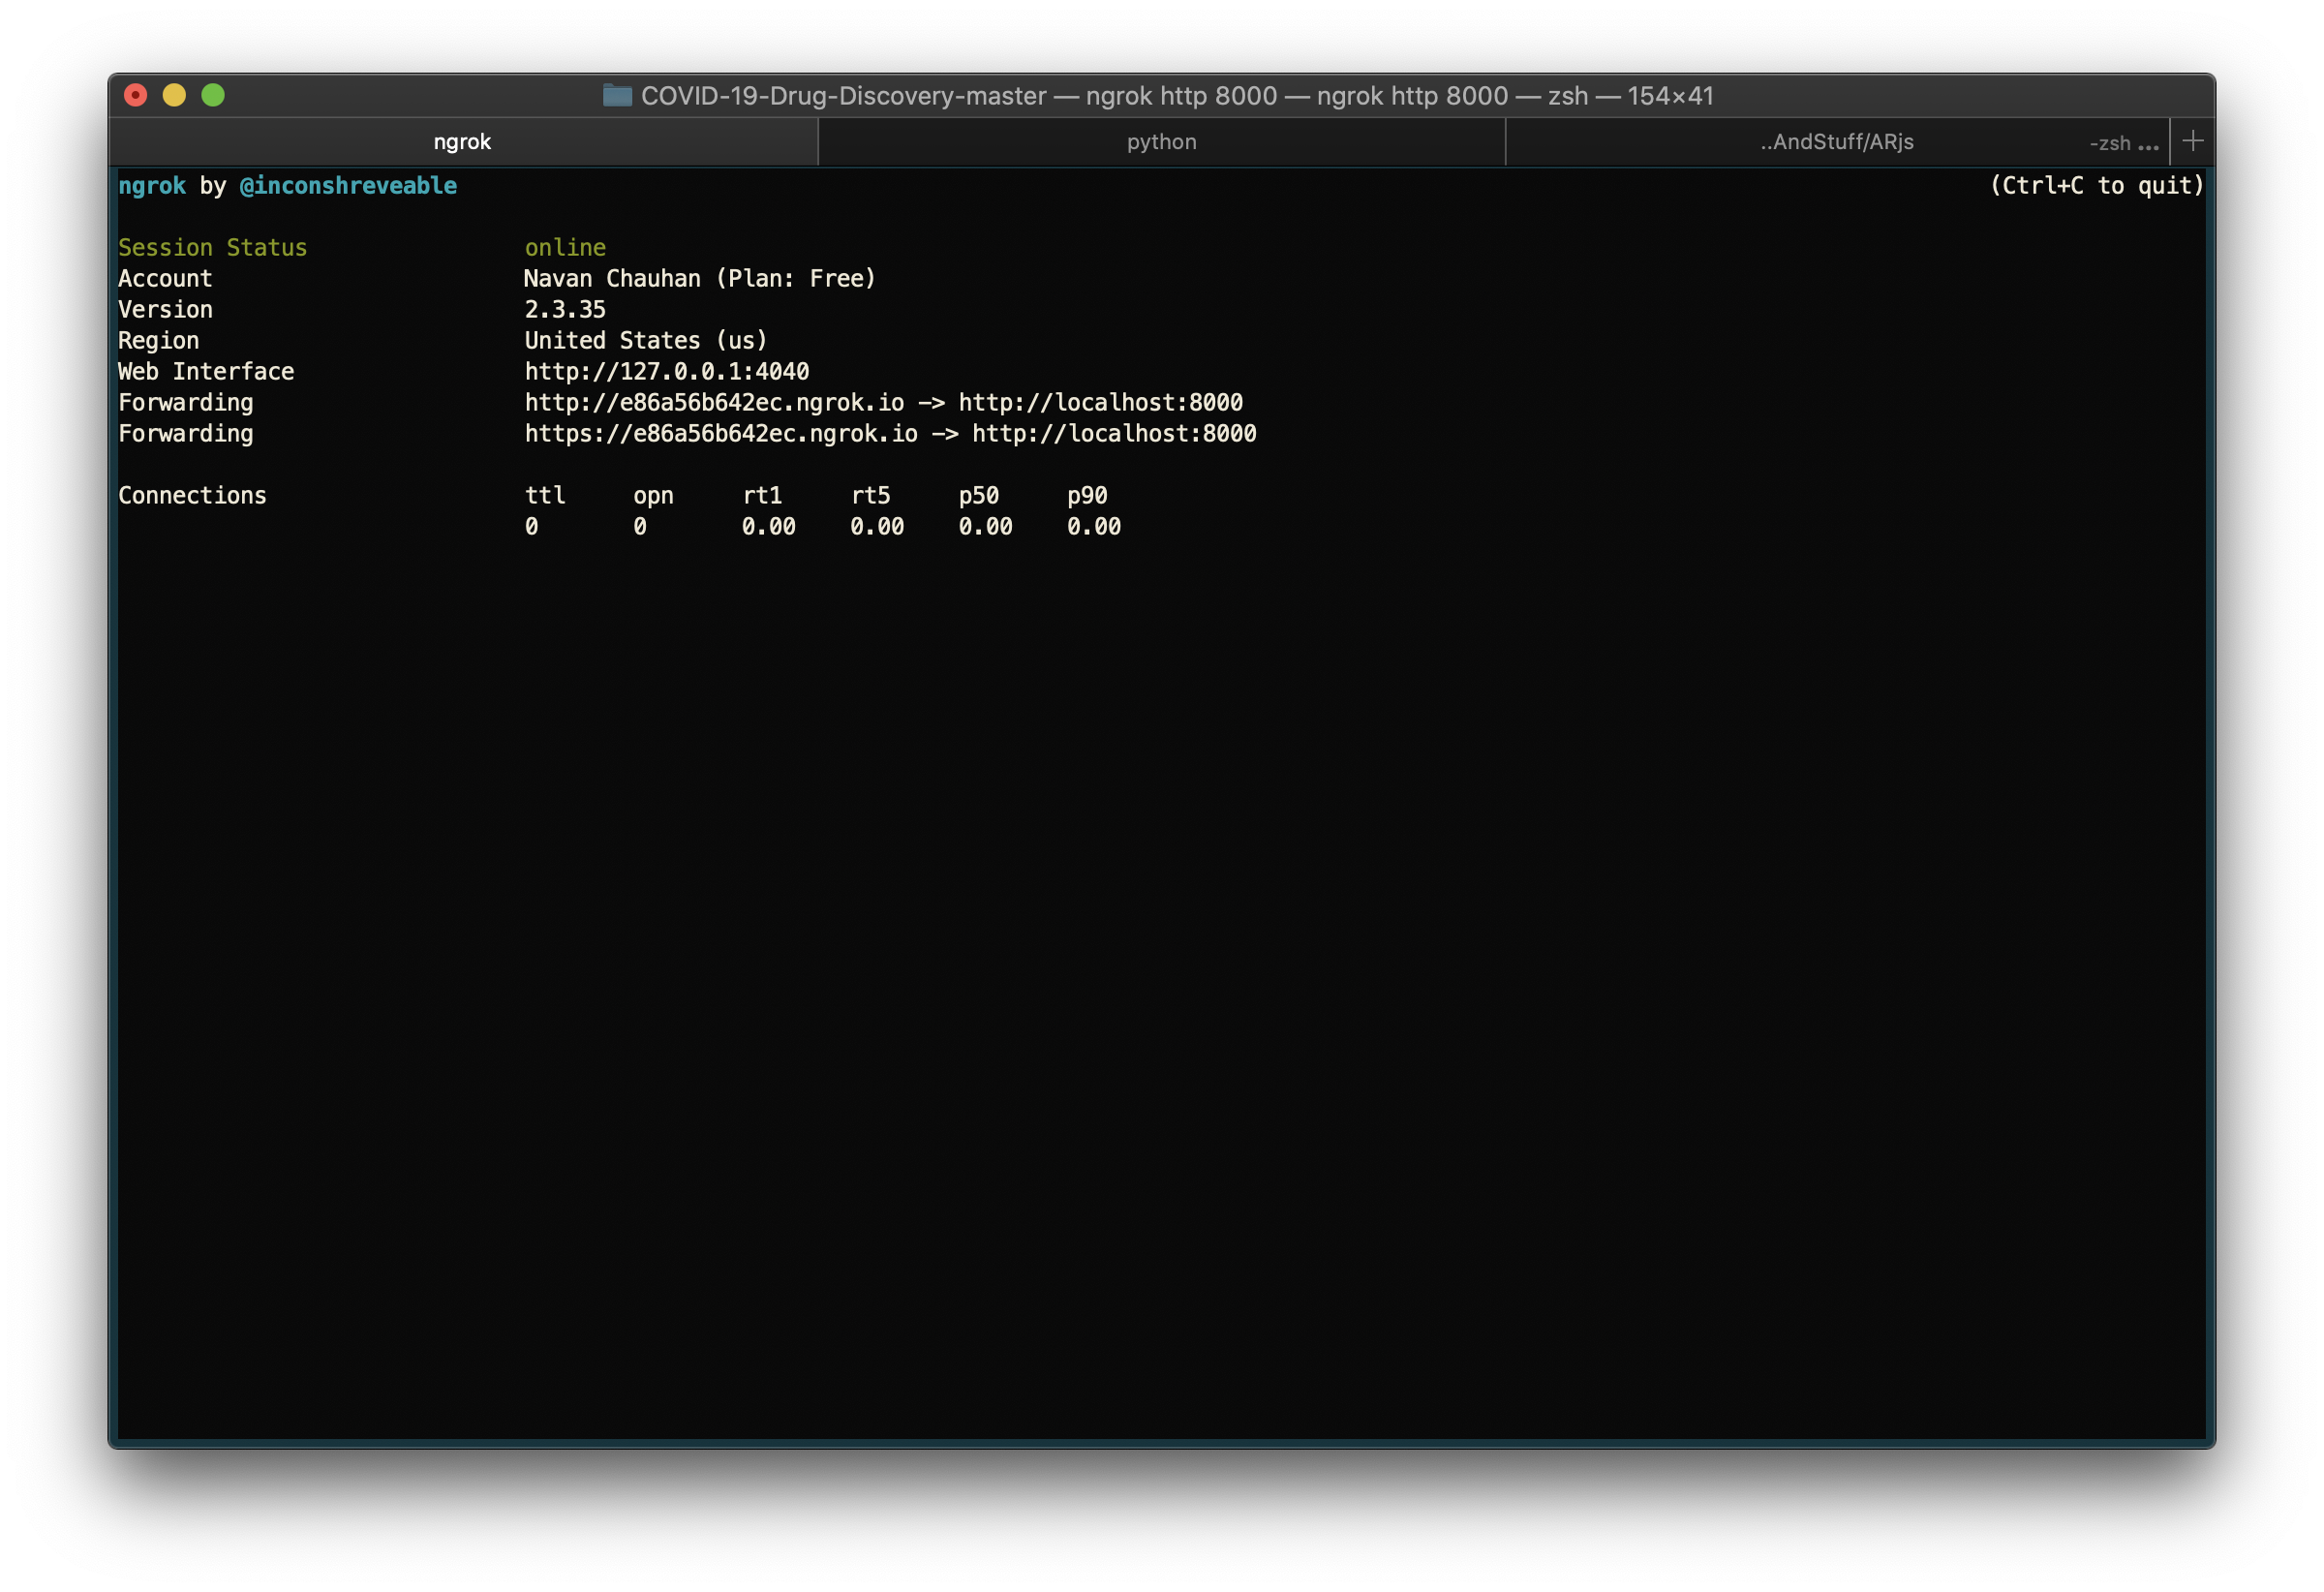
Now copy the url to your phone and try running the example

👏 Congratulations! You just built an Augmented Reality experience using AR.js and AFrame
Adding a Torus-Knot in the box
Edit your index.html
<a-nft ..>
    <a-box ..>
        <a-torus-knot radius='0.26' radius-tubular='0.05' ></a-torus-knot>
    </ a-box>
</ a-nft>

Where are the GIFs?
Now that we know how to place a box in the scene and add a torus knot in it, what do we do next? We bring the classic internet back!
AFrame GIF Shader is a gif shader for A-Frame created by mayognaise.
First things first
Add <script src="https://rawgit.com/mayognaise/aframe-gif-shader/master/dist/aframe-gif-shader.min.js"></script> to <head>
Change the box's material to add the GIF shader
...
<a-box position='100 0.5 -180' material="shader:gif;src:url(https://media.tenor.com/images/412b1aa9149d98d561df62db221e0789/tenor.gif);opacity:.5" .....>

Bonus Idea: Integrate it with GitHub's new profile Readme Feature!
1) Host the code using GitHub Pages
2) Create a new repository ( the name should be your GitHub username )
3) Add QR Code to the page and tell the users to scan your profile picture
??) Profit 💸
Here is a screenshot of me scanning a rounded version of my profile picture ( It still works! Even though the image is cropped and I haven't changed any line of code )